.svg)
.svg)
.svg)
.svg)
.svg)
.svg)
.svg)
.svg)
.svg)
.svg)
.svg)
.svg)
.svg)
.svg)
.svg)
.svg)
.svg)
.svg)
.svg)
.svg)
.svg)


The 5-minute guide to Paubox Email API
Paubox Email API is the only programming interface you need to send secure HIPAA compliant emails. Follow the 5-minute guide and learn the simple 4-step process to get set up with Paubox today. And our free tier allows you to send up to 300 emails every month, so there is no risk to try it.
.
4 simple steps to get started with Paubox Email API
Paubox Email API is an excellent option for covered entities to send transactional emails at scale by quickly integrating our secure, HIPAA compliant solution into their applications.
Step 1 – Sign up and create a Paubox account
The first step is to create a Paubox account. Visit this link and enter some basic information to get started. You’ll automatically transition to the corresponding tier if you send more than 300 emails a month. See our pricing for more details.
Step 2 – Activate and verify your domain
The next step is to activate your domain. This domain should be the one that you intend to use for sending emails with the API. To do this:
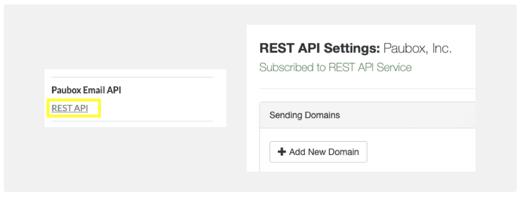
- Log in to the Admin Panel
- Click on REST API from the left menu bar
- Click the Add New Domain button
After adding your domain, you need to validate it by updating the DNS records. Click on the Settings icon to the right of your domain name and then click Manage Domain.

You can add a TXT or CNAME record to your domain’s DNS settings to verify it. After adding the information, return to this page and click Check now.
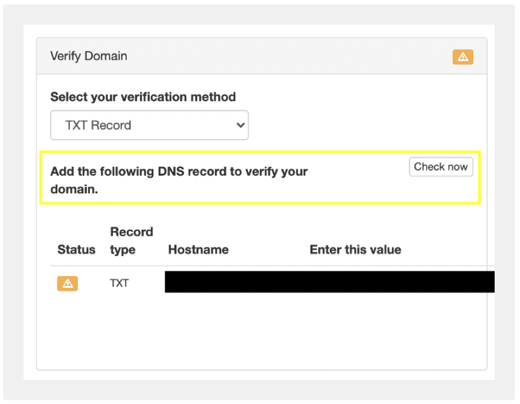
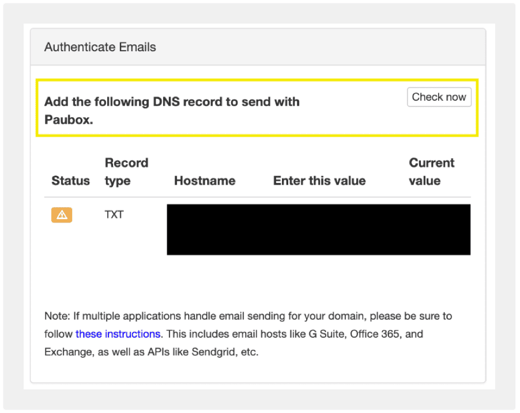
The verification may happen instantly or can take anywhere between 24-48 hours depending on your DNS host. You must also add your SPF record to the domain’s DNS records and verify it on the same page.
Step 3 – Generate your API key
After verifying your domain, the next step is to generate your API key. This authenticates API requests from your client with Paubox. Just as before, click on the Settings icon to the right of your domain name and then click Manage Domain.
You can generate multiple API keys to use in different applications. Be sure to save your API key after generating it, otherwise you would need to generate a new one.
To connect and securely send emails, you need the API key and your customer endpoint. This is shown on the Manage Domain page as well.

Step 4 – Integrate the API into your app
The last step is to use our HIPAA compliant API in your application. If you want to build something quickly, use our GitHub repository. There are several samples that you can check out on the Paubox Email API product overview page as well. We currently have samples for the following languages: C#, Java, Python3, Python2, PHP, Rails, Node, Perl, and Ruby. Seasoned developers can take a look at our Developer docs and build code from scratch.
Additional Paubox Email API resources
- Paubox Email API product overview
- GitHub repository for Paubox Email API SDKs
- The five-minute guide to Paubox Email API
- Paubox Email API documentation
- Using the NodeJS wrapper for Paubox Email API
- Using the Java wrapper for Paubox Email API
- HIPAA compliant email with Paubox Email API using the Python3 wrapper