.svg)
.svg)
.svg)
.svg)
.svg)
.svg)
.svg)
.svg)
.svg)
.svg)
.svg)
.svg)
.svg)
.svg)
.svg)
.svg)
.svg)
.svg)
.svg)
.svg)
.svg)


DKIM and SPF are email authentication mechanisms that ensure genuine emails reach the intended recipient's inbox and avoid being flagged as spam.
What is a DKIM record?
DKIM allows checking whether an email is received from the specific domain that is authorized. These signatures are generally not visible to the end users, and the recipients must verify them.
Why DKIM matters
Elena Yau, Director of Information Technology at Five Acres believes that setting up DKIM and SPF records is part of an effective strategy to mitigate cyber risks in 2024.
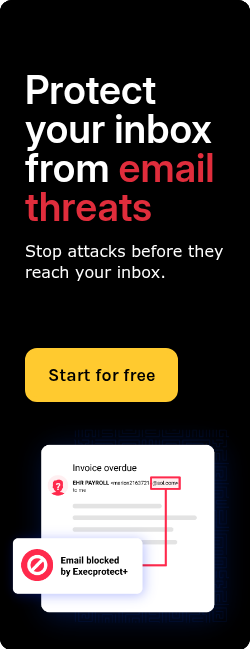
"I believe that the lowest hanging fruit to enhance cybersecurity globally is email since that is a common denominator across all organizations. As a community effort, I recommend that all organizations review their SPF, DKIM and DMARC and set up policies like Paubox’s ExecProtect to prevent spoofing authorities in their organization that deals with personnel records, financials, internal operations and has authorities for approval."
She explains, "If you wonder why your CEO, new account, or new HR person is spoofed, look at your SPF, DKIM, and DMARC."
Related: How to comply with Google's new email sender guidelines

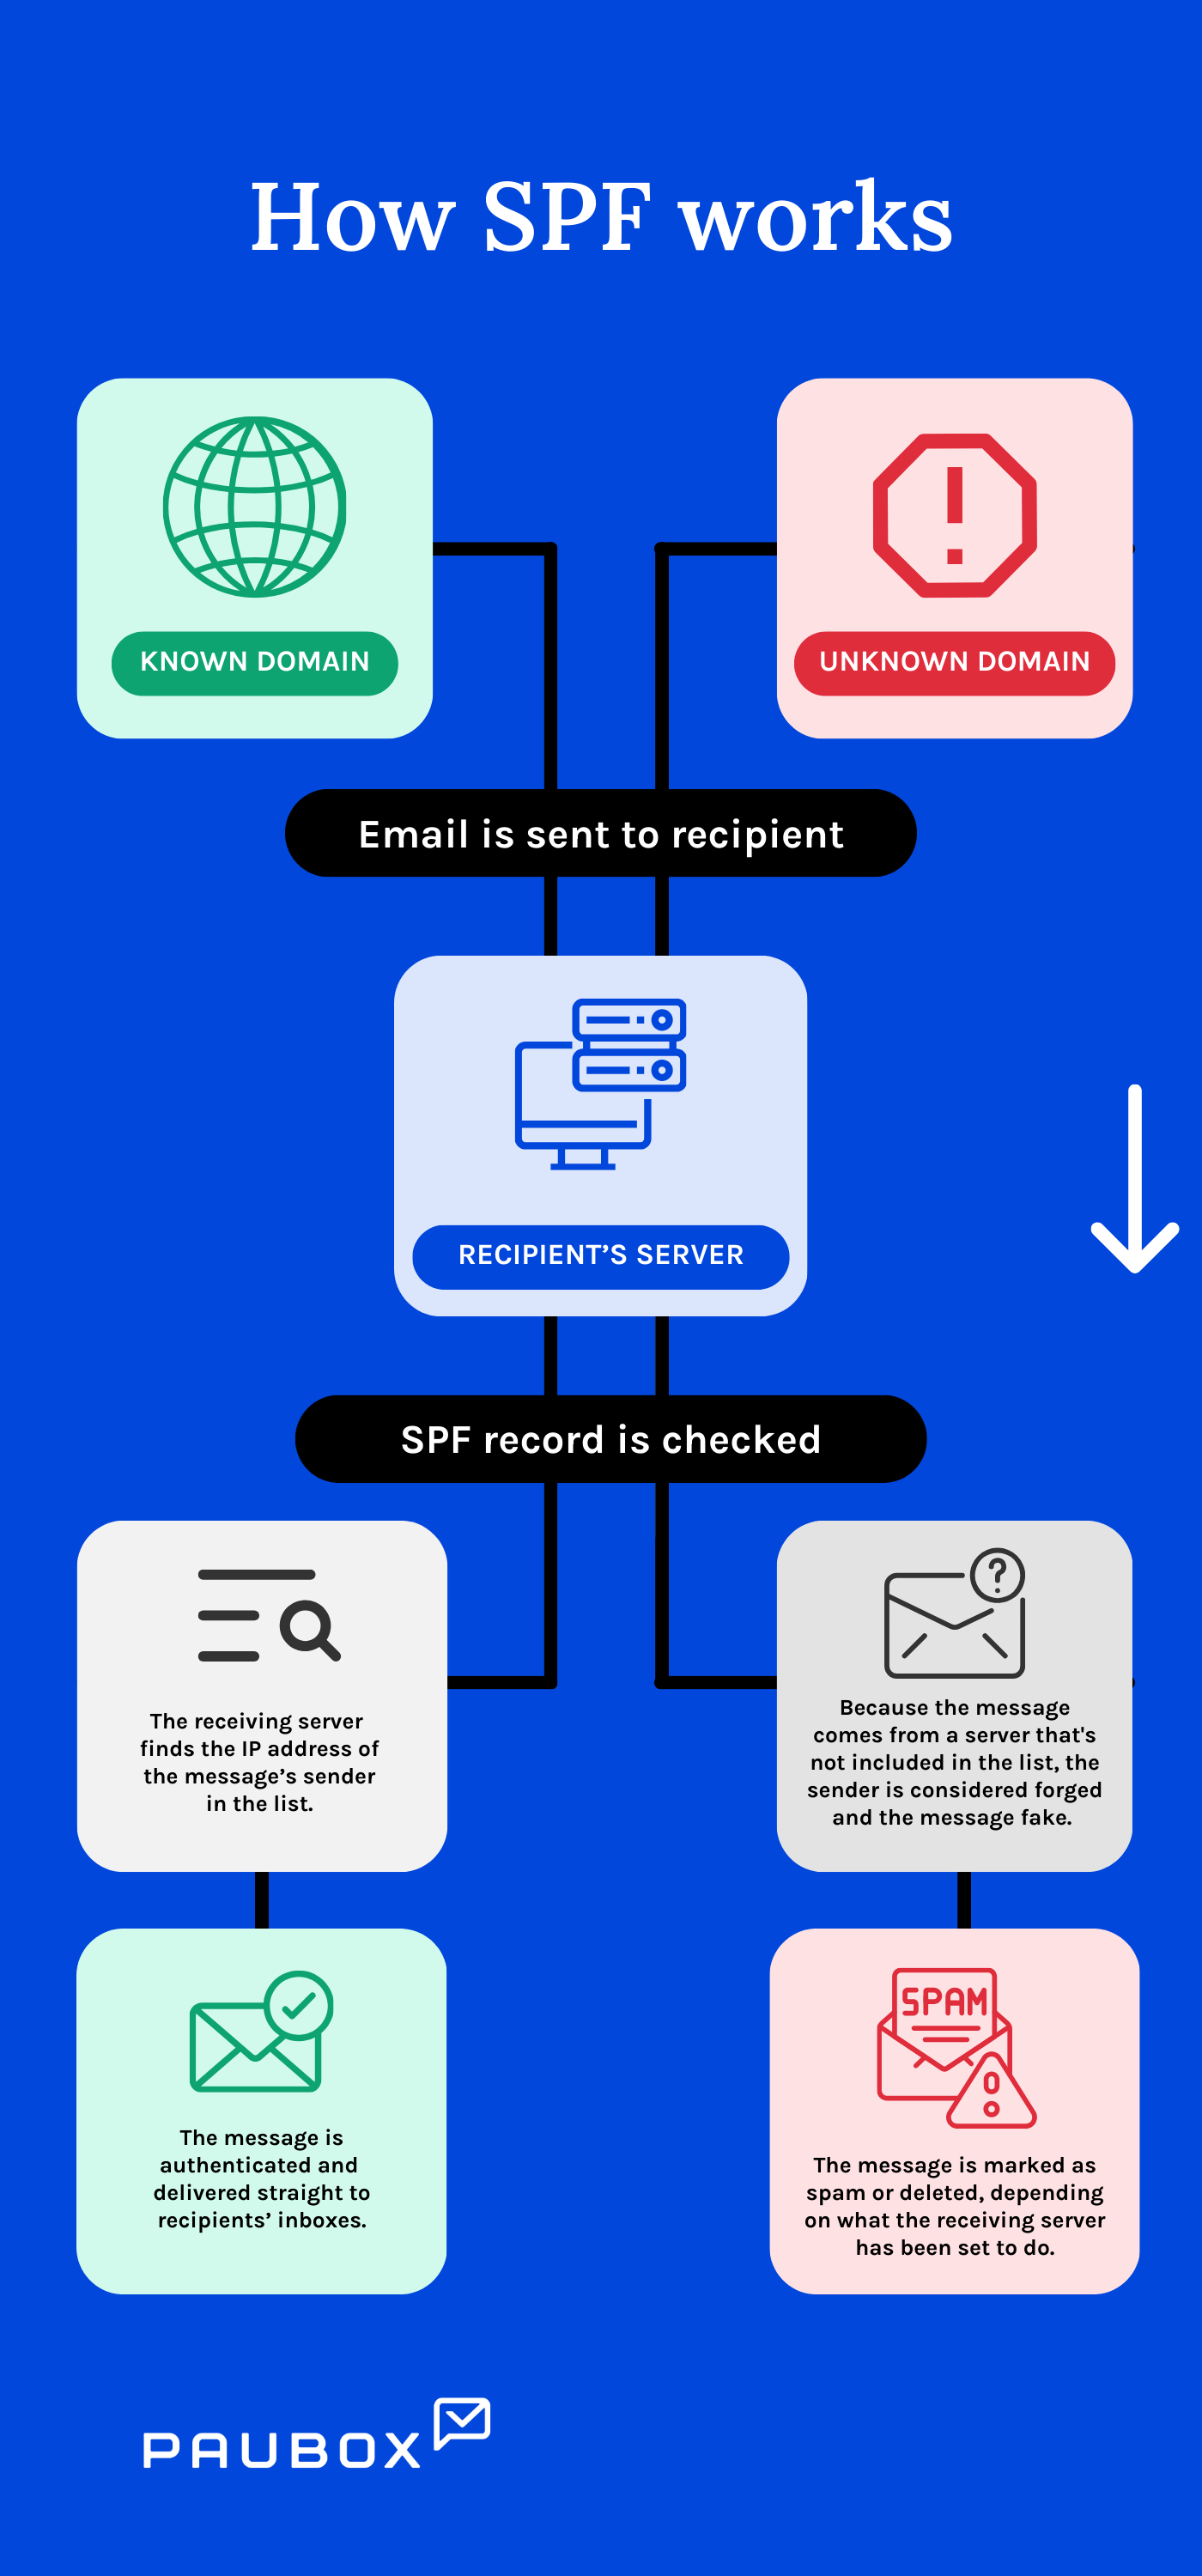
What is an SPF record?
SPF is a framework that allows a domain owner to specify which IP addresses or servers are authorized to send emails on behalf of their domain. It's essentially a list of authorized mail servers that can send emails from a specific domain. When an email is received, the recipient's email server checks the SPF record of the sender's domain to verify that the sending server is allowed to send emails on behalf of that domain.
See also: HIPAA Compliant Email: The Definitive Guide
How to set up a DKIM record
Step 1: Log in to Your Domain's DNS Management
Access the DNS management settings provided by your domain registrar, email service provider such as Google Workspace, or hosting provider such as Godaddy. This is where you'll make changes to your DNS records.
Step 2: Generate a DKIM Key
For this example, let's assume you're using Google Workspace as your email service provider:
Log in to your Google Workspace admin console.
- Navigate to "Apps" > "Google Workspace" > "Gmail" > "Authenticate Email."
- Select your domain and click "Generate New Record."
- A DKIM key will be generated, including a selector (e.g., Google) and the public key (p=MIGfMA0GCS...). Keep this information handy.
Step 3: Create a DKIM TXT Record in DNS
Return to your DNS management interface and create a new TXT record with the following details:
- Record Type: TXT
- Host: google._domainkey (This selector may vary depending on your email service provider, but for Google Workspace, it's "Google.")
- Value: v=DKIM1; k=rsa; p=MIGfMA0GCS... (Use the DKIM key generated in Step 2.)
Step 4: Save and Publish the DNS Record
Save the new TXT record and publish the changes. DNS updates may take some time to propagate across the internet, usually a few hours to a day.
Step 5: Verify DKIM Authentication
After the DNS records have propagated, you can verify your DKIM setup:
- Go back to the Google Workspace admin console and click "Start Authentication" (if using Google Workspace). This initiates the authentication process with the generated DKIM key.
- Wait for the authentication process to complete. It may take a few minutes.
See also: What information is protected by HIPAA's security rule?
How to set up an SPF record
Step 1: Log in to Your Domain's DNS Management
Log in to your domain registrar's website or hosting provider's dashboard.
Access the DNS management section. Look for options like "DNS Management," "Domain Settings," or "DNS Configuration."
Step 2: Create or Update SPF TXT Record
- Locate the option to add a new DNS record. This is usually labeled as "Add Record," "Create Record," or similar.
- Select the record type as "TXT."
- In the "Host" field, enter "@" if you want to set up the SPF record for the root domain (e.g., example.com), or enter the subdomain if you're setting it up for a subdomain (e.g., mail.example.com).
- In the "Value" or "Data" field, enter your SPF record.
- Set the "TTL" (Time To Live) to your preference. The default value is usually acceptable.
- Click save or publish to update the SPF record.
Step 3: Wait for DNS Propagation
DNS changes may take some time to propagate across the internet. This process typically takes a few hours to a day.
Step 4: Verify SPF Record
After the DNS changes have propagated, you can verify your SPF setup using various online SPF record validation tools or by sending test emails and checking the received email headers.